> ## Documentation Index
> Fetch the complete documentation index at: https://myinternshiporganizer.com/docs/llms.txt
> Use this file to discover all available pages before exploring further.
# Create an internship
> Set up a travel period for a group of interns, ready to add interns and place them.
An internship is one group of interns travelling for one period. Creating it is
the starting point for everything else — you add interns to it, place them with
host firms, and track their travel and programme against it.
## Before you begin
* Any role can create an internship.
* If the interns come from a partner school, connect that sending organization
first. You can also add it later.
* Know roughly when the interns are travelling. Exact dates aren't required.
## Create the internship
In the sidebar, select **Internships**.
Select **New Internship**.
Choose **Individual** for a single intern, or **Group** for several.
Group is the usual choice. Individual fixes the planned count at 1, so pick
Group if there's any chance a second intern joins.
Select **Select sending organization…** and choose the school or agency,
then select **Next**.
This step is optional — select **Next** to skip it if the partner isn't
confirmed yet.
Choose how firm your dates are:
* **Exact dates** — travel is booked and the dates are fixed.
* **Preliminary window** — you know roughly when, not precisely. You also
have to say how many **days of internship** fall inside that window.
Then pick the start and end, and select **Next**.
Give the internship a name, set the **intern count** if it's a group, and
choose at least one **field of expertise** — that one is required, and it's
what drives which host firms get recommended when you start calling.
Keep the name short; the list truncates long ones.
## Result
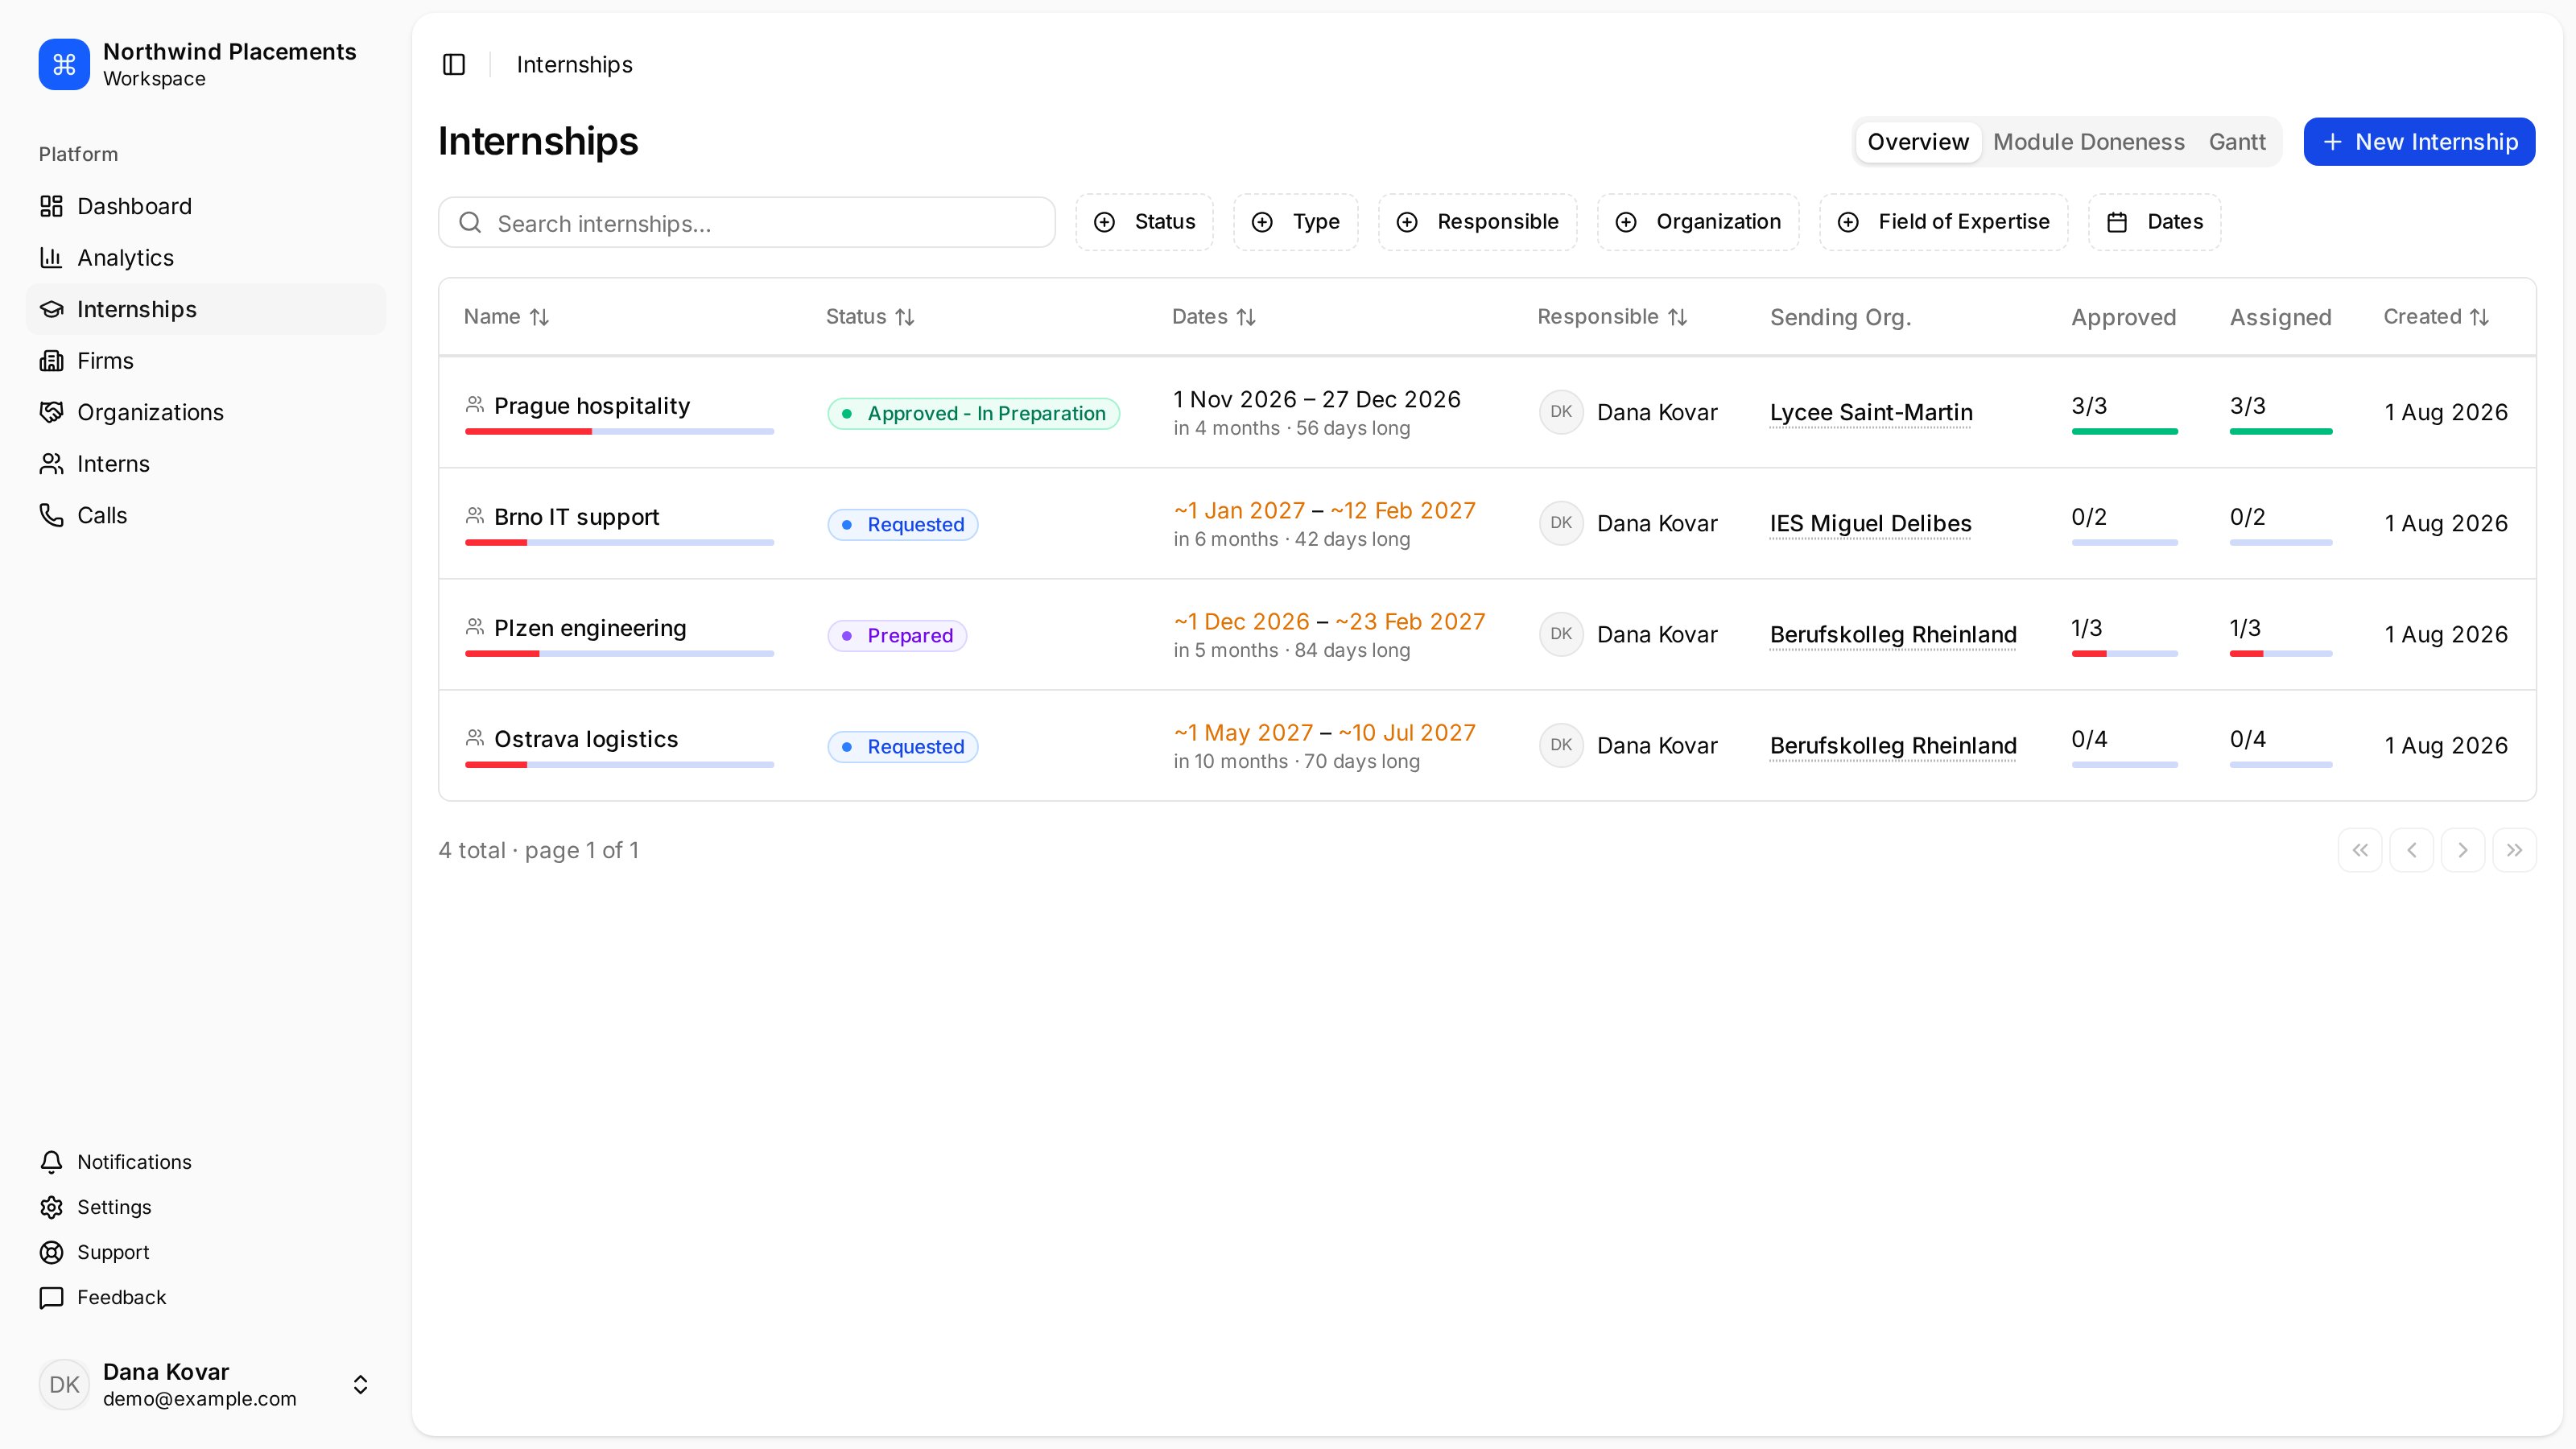
The internship appears in your list with the status **Requested** and no interns
assigned yet. Preliminary dates show with a `~` in front of them.
 ## What happens next
Creating the internship doesn't place anybody. From the internship's
**Interns & Firms** section you add interns to the roster and place each one
with a host firm.
The internship starts with most modules already **on** — arrival, departure,
companion, meal tickets, transport tickets and others come from the service
template. Turn *off* the ones you don't need rather than turning things on.
Do it now if you're going to: modules can only be changed while the internship
is in **Setup**. Once it's approved they're fixed. See
[What you can change, and when](/docs/reference/internship-phases).
## Troubleshooting
**"No placement agent branch found for the current user's firm."**
Your organization has no branch marked as a placement agent, so there's nothing
to own the internship. A Firm Admin needs to fix this under **Settings** >
**Company** — it affects everyone, not just you.
**The sending organization isn't in the list.**
It hasn't been connected yet. Leave the step empty, connect the organization,
then set it on the internship afterwards.
## What happens next
Creating the internship doesn't place anybody. From the internship's
**Interns & Firms** section you add interns to the roster and place each one
with a host firm.
The internship starts with most modules already **on** — arrival, departure,
companion, meal tickets, transport tickets and others come from the service
template. Turn *off* the ones you don't need rather than turning things on.
Do it now if you're going to: modules can only be changed while the internship
is in **Setup**. Once it's approved they're fixed. See
[What you can change, and when](/docs/reference/internship-phases).
## Troubleshooting
**"No placement agent branch found for the current user's firm."**
Your organization has no branch marked as a placement agent, so there's nothing
to own the internship. A Firm Admin needs to fix this under **Settings** >
**Company** — it affects everyone, not just you.
**The sending organization isn't in the list.**
It hasn't been connected yet. Leave the step empty, connect the organization,
then set it on the internship afterwards.